|
|
 Re: Newbie here needs help, I have towing questions for '95 SR
[Re: Liquid_force]
#343187
11/15/03 06:08 AM Re: Newbie here needs help, I have towing questions for '95 SR
[Re: Liquid_force]
#343187
11/15/03 06:08 AM
|
Joined: May 2001
Posts: 1,379

Body Damage is Cool
|
BTW - Cap - how much work is it to remove the rear bumper cover?? I would really like to run my wires for my lights underneat it instead of around the door jamb. Not hard at all, there are probably 8 screws you'll need to remove and the rear lights wires.
[b]94/95 Montero SR "rockcrawler" Riding on 37" MTRs 
|
|
|
Re: Newbie here needs help, I have towing questions for '95 SR
[Re: PHIL_]
#343188
11/15/03 06:10 AM
|
Joined: May 2001
Posts: 1,379
Body Damage is Cool
|
That's the nicest on the forum.... OMG! <img src="/forums/images/graemlins/wink.gif" alt="" /> <img src="/forums/images/graemlins/shiner.gif" alt="" /> <img src="/forums/images/graemlins/pfft.gif" alt="" />
[b]94/95 Montero SR "rockcrawler" Riding on 37" MTRs
|
|
|
Re: Newbie here needs help, I have towing questions for '95 SR
[Re: cap510]
#343189
11/15/03 06:18 AM
|
Joined: Oct 2003
Posts: 1,258
Body Damage is Cool
|
Speaking of towing, how strong is the factory bumper "hook"? It's not going to break off if I use it for recovery purposes, is it? I want to throw a shackle on it.
Sorry if this is a bit off-topic.
I agree, Cap510 has one sweet ride!
1997 Montero SR
<a href="www.georgiaoverland.com" target="_blank">www.georgiaoverland.com</a>
|
|
|
Re: Newbie here needs help, I have towing questions for '95 SR
[Re: DavidG]
#343190
11/15/03 06:24 AM
|
Joined: Jun 2002
Posts: 6,211
Trail Leader
|
The hooks, at least on a Gen I, are not attached to the bumper, per se, but are attached to the frame. I wouldn't worry about that coming loose. I want to put a shackle on the rear loop on mine, too, because running the strap through there is a pain in the rear. I'd remove it for daily driving, though, as it would slap around over bumps and make a heck of a racket.
John B.
'87 Raider 2.6 Turbo Auto, Under Construction
'95 Montero SR, 35x12.5/15 BFG M/T KM-2's, Rock sliders, Qtr panel chop, gas tank lift, 2" BL, Aisins, 5.29s
'95 Pajero Mini
'98 Montero Winter Ed.
'04 Cadillac XLR
'03 Kawasaki ZRX1200R
'60 Ford Falcon 4Dr
|
|
|
Re: Newbie here needs help, I have towing questions for '95 SR
[Re: DavidG]
#343191
11/15/03 07:00 AM
|
Joined: May 2001
Posts: 1,379
Body Damage is Cool
|
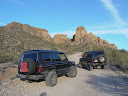
Speaking of towing, how strong is the factory bumper "hook"? It's not going to break off if I use it for recovery purposes, is it? I want to throw a shackle on it. The "hook" attaches to the frame and is very strong, I used mine quite a bit at the last sierra challenge trip pulling a SWB through some tough terrain. Here is a picture of the "hook" ![[Linked Image]](http://www.cap510.com/images/rear.jpg)
[b]94/95 Montero SR "rockcrawler" Riding on 37" MTRs
|
|
|
Re: Newbie here needs help, I have towing questions for '95 SR
#343192
11/15/03 04:12 PM
|
Joined: Jul 2000
Posts: 54
Getting the Wheeling Fever
|
Here's a re-Post of a Draw Tite Hitch & Wiring Install done on my 2000 Sport. Bumper removal, for tucking in the Wiring Harness, is only partially required on the left side, and is less involved than Factory Harness Wiring Instructions indicate.
I also installed "Air Lift 2000" in-Coil Air Bags, and a top-of-the-line Tekonsha Electric Brake Controller. The "sag" Spec below is w/o Air Bag inflation adjustment.
Take Tekonsha's advice, and run a separate wire w/Breaker [I used a 30 Amp one] to the Trailer Connector, and ensure that it's got a dedicated Ground wire. You don't want Electric Brakes going out due to high Braking current passing back through a common, undersized Trailer Ground wire that could burn through.
Locking the Tranny into a lower, single gear works wonders going uphill, and in going downhill [on I-70 near 11,000 ft. elevation].
As the Bumper Sticker - and the sage advice above - indicates: "Easy Does It"...
----------------------------------------
Here's a hands-on procedure that should streamline the installation of a trailer hitch receiver and wiring harness on a Montero Sport 2000. I thought that even the experienced folks on this Board might pick up a new tip or two from all of this detail.
Background Information
Items installed:
Draw Tite Model 75075 Class III Hitch ~ 5 000 lb. capacity
Price: $110- including UPS delivery to CO. Call: "1.800.HITCHIT"
Trailer wiring harness #AMT7YH1X02 - ~$50- from Dealer
Tools required:
10 mm socket
17 mm socket
Drivers for sockets above and various extensions of choice
17 mm fixed, or adjustable open end wrench
Long nose pliers
Phillips screwdriver [or a drill with a Phillips bit]
Slot screwdriver
Safety glasses [lots of stuff can & will fall into your eyes]
Irish coffee [optional]
Total Installation Time: ~2.5 hours
Wiring: ~1.75 hours
Hitch: ~.75 hour
Trailer Harness Wiring Color Code:
Right Turn/Stop GREEN ~ W/YELLOW STRIPE
Left Turn/Stop YELLOW
Running Lights BROWN
Chassis ~ Electrical Ground WHITE
Receiver Bottom Inside Edge Height Above Level Surface
Unloaded ~17.75"
275 lb. Tongue Load ~15.50"
Installation Procedure
1. With an impact wrench, remove rear tow hooks on both sides. I had this done at the Dealer for free. Retain the 4 long 17 mm bolts and hardware to mount trailer hitch. Lower and remove the spare tire; you'll definitely need the working space.
2. Remove both tail light assemblies. This is done by removing the 2 Phillips screws on each assembly by the rear hatch door gasket. Then, tuck a slot screwdriver under the outer vertical edge of each tail light midway down the light after wrapping the screwdriver handle with paper or duct tape to protect body paint. Pry the lamp assembly straight back. This will pop the 2 outer friction fit pins of the light housing loose from their mounting holes. This little "light prying out trick" is missing from Step 1 of the factory wiring harness instructions.
3. With a 10 mm socket, remove all 8 exposed bumper fascia bolts mounted around the bumper fascia top.
4. Using long nose pliers, start under the bumper on one side and squeeze the clips holding the black bumper step down. With your other hand, simultaneously pry this bumper step up and remove it. Other Writers and the factory instructions suggest using a deep 10 mm socket [or 9 or 8 mm] to compress these 14 clips, but that technique didn't work for me.
5. Remove the 6 plastic rivets in the bumper top by first prying up the rivet center with a slot screwdriver. In a 2nd step, pop the rivet up and out using long nose pliers. Easy does it.
6. "Step 4" to loosen 8 bumper bolts in the factory instructions can be skipped IF you feed the wiring up through the far outer edge of the bumper rather than installing the wiring harness from above as the factory instructions recommend. I think this step was intended to gain more flexibility in the bumper fascia for wire feedthrough, but I did not note any difference.
It might even be possible to skip other steps above, but I followed the factory instructions until realizing that mounting the wiring harness from under the bumper would be better.
7. The wiring harness sockets and the small wiring harness converter box will barely clear when fed up through the furthest outside hole in the bumper. I'm guessing that this little sealed converter box has circuits to prevent reverse voltages from harming the electrical system.
8. Pull the wiring sockets up from underneath the bumper. One has to pull back damned hard on the outer edges of the bumper fascia no matter how much hardware has been removed. The factory instructions make this step of pulling back the fascia to feed through the wiring sound easier than it is. Fortunately, the bumper fascia is flexible, forgiving material.
9. Run the wiring up into each tail light assembly, as in the factory instructions. Note that this wiring is inevitably exposed for ~6" just outside the hatch door gasket - from where it emerges at the top edge of the bumper fascia - until it enters the lower inside edge of each tail light assembly.
Having this wiring exposed, as shown in the factory instructions, is kinda cheesy. I was not able to alternately fish the wiring up through the body through the rear of the removable grommet sealing the tail light wiring in place. There may not be enough wire length for this wire routing anywayà. However, a different wiring harness routing would provide a more professional finish.
10. Plug the wiring harness into each polarized tail light socket instructions. Stick down the wiring harness converter box with the supplied sticky tape just under the left tail light grommet as recommended. Reinstall the tail light assemblies now or later. Pull the excess harness wiring down through the bumper fascia until snug.
11. Cable tie/secure the wiring harness on to 2 holes available under the bumper. You won't be able to do this after mounting the hitch. Let the center trailer connector hang loose for now.
12. Use 4 long leftover bolts [mounted vertically] and 4 short bolts [mounted horizontally] supplied by Draw Tite with washers to mount the hitch. Hold the 4 loose nuts stationary with an open end wrench while tightening the long bolts. First, clean mud out of out and lubricate the nuts welded onto the frame.
Torque specs: Long bolts = 68 ft. lbs.
Short M10 bolts into existing welded frame nuts = 38 ft. lbs.
I had to hammer hard on the hitch end plate a few times and bend it in to ensure clearance up inside the Montero frame. I had good luck supporting the hitch with my knee while getting one bolt in on one side of the hitch. However, using a 2nd person or wood blocks or a jack to support the hitch would have been more convenient. Push the hitch backwards as much as possible before tightening any bolts to provide maximum spare tire clearance later.
13. Reinstall all bumper and fascia hardware in reverse order. Remount spare tire. As reported by other Writers, the spare tire fit is DAMNED tight. My spare almost didn't mount back up completely. I will eventually mount a spare tire with worn tread of a slightly-smaller diameter to ensure that it better clears the center of the hitch receiver [the tire sticking point].
14. Snap the square electrical harness connector onto the hitch receiver safety chain loop. This can be the permanent connector to the trailer if you like.
If you want to wire on a polarized round trailer connector, there is not a prefab connector mounting place provided on the hitch. One has to get creative in finishing out this electrical and mechanical detail.
Hitch cost was not a big issue. I bought a Draw Tite hitch for these very subjective reasons:
a. It completely hides VERY NICELY up under the bumper fascia, exposing only the 2" receiver. Appearance mattersà
b. I did not want a hitch protruding back in the way of our old dog jumping out of the hatch door. It's a challenge for him as it isà
c. I bashed my shins on my '90 Montero hitch enough times to want a hidden hitch mount.
d. Taking tips from other Writers, I did not want a low hitch mount dragging during 4 wheeling.
e. I did not want or need the foot step reportedly included on the factory hitch.
f. Having been rear-ended years ago, I didn't much care about the additional rear crash protection that some Writers say is provided by some other trailer hitch designs. ;-0
No animals, knuckles or eardrums were harmed in the mounting of this trailer hitch.
Engineer Guy
[i]The same people that you meet on the way up, you gonna meet up... on your way down</I] Little Feat
|
|
|
|