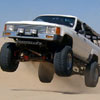
It took a lot of sketching and resketching, but I finally came up with this design.
![[Linked Image]](http://thebandit.xtremefabricator.com/frontbumper/frontbumper.jpg)
After holding up some scrap pieces of bent tubing to the truck and scratching my head, I decided it would be worth spending some time in Photo Shop to see if I would like the design. Here is my 4Runner with a PhotoChopped bobb, paint job, and minimalistic exocage.
![[Linked Image]](http://thebandit.xtremefabricator.com/frontbumper/frontbumper5.jpg)
Okay, I like it! Time to get to work. The next step was a lot of careful measuring. I sketched out front, side, and top views of the key points on my 4Runner. Then I took lots of measurements and drew in circles to remind myself to offset to account for the tube. Next, I transfered my key points into Bend Tech Pro. Gotta be careful here and double check all points.
![[Linked Image]](http://thebandit.xtremefabricator.com/frontbumper/frontbumper6.jpg)
There are a few different ways to make parts in Bend Tech Pro. I like to get all my pick points figured out, then connect the dots. You can also make each piece individually in EZ3D and then couple them together.
![[Linked Image]](http://thebandit.xtremefabricator.com/frontbumper/frontbumper1.jpg)
Here's what it looks like using 1-3/4" tubing and a 6" CLR. What better color than yellow?
![[Linked Image]](http://thebandit.xtremefabricator.com/frontbumper/frontbumper2.jpg)
![[Linked Image]](http://thebandit.xtremefabricator.com/frontbumper/frontbumper3.jpg)
There are two pieces with four bends. The very uppermost piece (number 6 below) is a multi-plane part with four bends. It's hard to see but there are some smaller bends just outside of the two middle bars. I circled them in red.
![[Linked Image]](http://thebandit.xtremefabricator.com/frontbumper/frontbumper2label.jpg)
I don't have a notcher and since I have NO EXPERIENCE with tubing, I'm going to rely heavily on Bend Tech Pro's tube coping feature.
![[Linked Image]](http://thebandit.xtremefabricator.com/frontbumper/frontbumper4.jpg)
This will be my FIRST TIME ever bending tube to make something useful and I will be using my recently completed numerically controlled hydraulic tube bender! Here's a shot of me next to the bender:
![[Linked Image]](http://bender.xtremefabricator.com/bender1.jpg)
And here is a video of it in action with my girlfriend at the wheel:
CLICK HERE FOR VIDEOThere is a VERY DETAILED writeup with hundreds of pictures here if you are interested:
http://www.extremefabricator.com/BB/viewtopic.php?t=8Today I got the first few pieces bent for the bumper. Here's my plane of bend bracket, which was custom made by John (aka CaptainFab) on
www.offroadfabnet.com. John has been following my progress on the bender and offered to make this for me to save time. He even custom powdercoated it yellow (the future color of the bender) and added a knurled setscrew. THANKS JOHN!
![[Linked Image]](http://thebandit.xtremefabricator.com/frontbumper/frontbumper8.jpg)
(below) The first piece I made was the lower hoop. This came out perfect, but I ran into a bug with the cutting templates (now worked out) and will have to cut it for fit tomorrow.
[img]
http://thebandit.xtremefabricator.com/frontbumper/frontbumper9.jpg[/img]
(below) Here I am measuring to check the angle. I didn't have to rebend a single piece today; springback was consistent from tube-to-tube and the bender nailed every angle. Bend Tech Pro worked awesome!
[img]
http://thebandit.xtremefabricator.com/frontbumper/frontbumper10.jpg[/img]
(below) The next part is the waistline hoop. This is a four bend, single plane part. Here I am gearing up for bend number 2.
[img]
http://thebandit.xtremefabricator.com/frontbumper/frontbumper11.jpg[/img]
[img]
http://thebandit.xtremefabricator.com/frontbumper/frontbumper12.jpg[/img]
(below) The completed part, ready to remove from the bender.
[img]
http://thebandit.xtremefabricator.com/frontbumper/frontbumper13.jpg[/img]
[img]
http://thebandit.xtremefabricator.com/frontbumper/frontbumper14.jpg[/img]
(below) I did this work today by myself, so I didn't have anyone to hold it up to the truck to check fit.
[img]
http://thebandit.xtremefabricator.com/frontbumper/frontbumper15.jpg[/img]
(below) Later in the evening one of my roommates got home. I had him hold the part up while I took pictures. It sticks out a little further than I had pictured, but the measurements are correct and it should accomodate a winch without moving the A/C condensor.
[img]
http://thebandit.xtremefabricator.com/frontbumper/frontbumper16.jpg[/img]
[img]
http://thebandit.xtremefabricator.com/frontbumper/frontbumper17.jpg[/img]
I'll do my best to keep this thread updated with progress for those that are interested. Tell me what you think!